How to Install Hurricane Shutters

Hurricane Shutter Installation at a Glance
- Tools & Materials: Cordless drill, level, screws, screwdriver, wingnuts, keyhole washers, tape measure, silicone caulking
- Step 1: Install header track
- Step 2: Mount bottom track
- Step 3: Attach shutters
- Step 4: Overlap shutters
When the high winds and lashing rains of hurricane season come calling, it's best to be as ready as you can be. If you live in an area prone to gale-force winds, tropical storms or hurricanes, it's important to be on top of hurricane preparedness.
This May Also Interest You: It’s Hurricane Season! Here’s Everything You Need to Know to Prepare Your House for Storms
As a part of that preparation, hurricane shutter installation is key to protecting your home. Here are some fundamentals of how to install hurricane shutters.
What Are Hurricane Shutters?
Airborne debris crashing into windows or glass doors is the cause of a major portion of high-wind damage. Storm shutters or hurricane shutters protect these vulnerable points of a home. Their function is to defend against storm-borne debris, which is why they're also known as storm panels.
Can I Install Hurricane Shutters Myself?
Yes, you can install these shutters yourself. It’s a simple process that takes just a few minutes at a time, provided you have the tools and experience to handle the basic steps. Hurricane shutters are typically installed as a temporary measure in response to severe weather conditions, so you'll want to make sure they're easily accessible and that you've practiced the installation steps for all your shutters well before you actually need to use them.
Most kinds of hurricane shutters can be installed using basic tools. You'll want a cordless drill and a level, screws and a screwdriver, wingnuts and keyhole washers, a tape measure and some silicone caulking.
Check local building codes to ensure that whatever you're installing meets code requirements, and make sure you have the manufacturer's instructions in hand. Ensure that you have the right mounting materials for the type of wall where you'll be installing your hurricane shutters. Different kinds of hardware will be needed for wood and brick, for example.
How to Install Hurricane Shutters: Step-by-Step
Step 1: Install the Header Track
Most kinds of hurricane shutters need to be installed in tracks that anchor them to the house. Start with the upper or header track, placing it horizontally above the window and putting its bottom edge flush with the top edge of the opening. Drive a screw near the track's center, level it, drive in the remaining screws and apply a bead of silicone caulking across the top for waterproofing.
Step 2: Install the Bottom Track
Slip a shutter into the header, press it tight to the surface and mark the point where it meets the wall below the window. Measuring 1/2 inch down from that point, mark a level line, place the bottom track flush with that line and screw it into the wall.
How Do You Install Hurricane Shutters Without a Track?
Some shutters are built for direct mounting, meaning you can install them without tracks. If you're using this kind of shutter, you will simply bolt them to the house wall using permanent threaded inserts that you've previously set there, driving a machine screw into each insert. When the time comes to mount the shutter, you take the screws out, place the shutter in position over the inserts and put the screws back in.
More Related Articles:
- Hurricanes Happen: How Ready Is Your Home?
- Gimme Shelter: Here’s What You Need to Know About Building a Home Storm Shelter
- How Much Do Flood Damage Repairs Cost?
- What’s a Storm Chaser and Should You Hire Them to Fix Your Roof?
- No Water in the Basement! Here’s How to Protect Your Home From Severe Flooding
Step 3: Install the Shutters
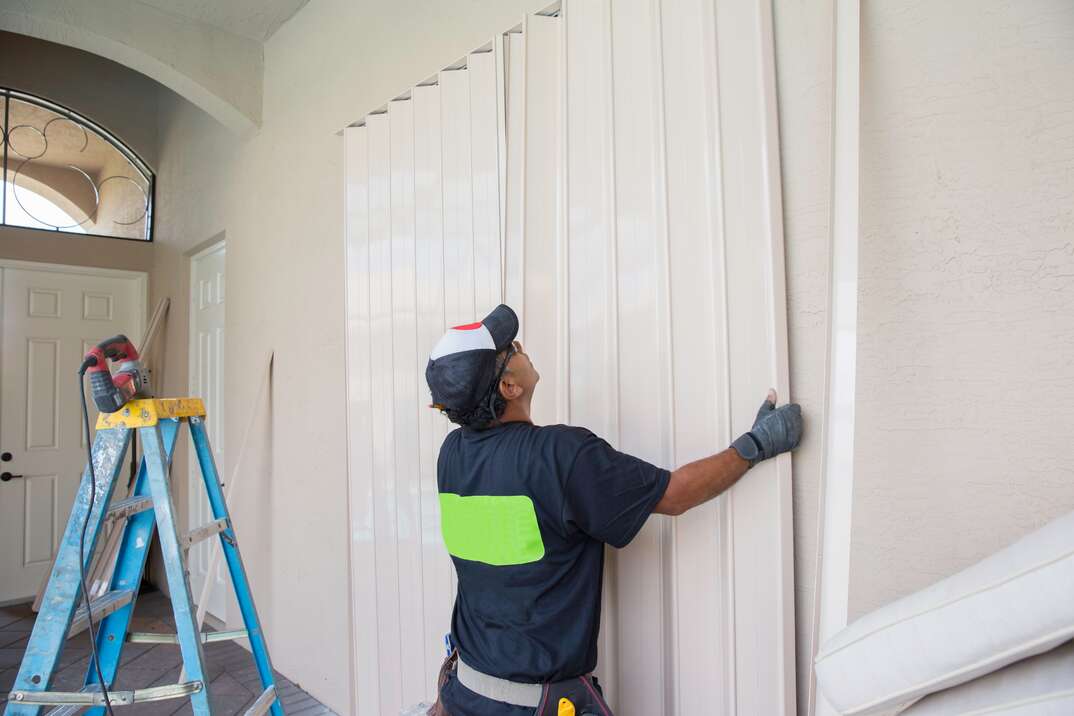
With the tracks in place, you can install the shutters. Start by slipping the upper edge of the first shutter into the header track and then press the bottom against the wall.
The bolts on the bottom track should protrude through keyhole slots in the bottom of the shutter. Place keyhole washers over the bolts and thread a wingnut onto each bolt. The fastest way to do this is to use a drill with a wingnut driver.
Step 4: Overlap the Shutters
Once you've inserted the first shutter into the tracks, you can then slip the second shutter into place, overlapping the first one. After that, simply repeat the above steps until all your panels are securely mounted in the tracks. Once you've done this, your installation is complete.
How Do You Install Hurricane Shutters on the Second Floor?
Aluminum storm panels are not a recommended option for the upper floors of two-story homes. This kind of installation is difficult and dangerous for the do-it-yourselfer working from a roof or ladder, no matter how experienced. Professionally installed accordion shutters are the best alternative.
Installing Other Types of Hurricane Shutters
The installation process described above applies to common and relatively inexpensive types of hurricane shutters — in particular, the basic aluminum storm panel. They're cheap and versatile and can be used to protect both windows and doors.
Similar types of shutters with slightly different designs can likewise be installed on a temporary basis, while other types of installations are more permanent:
- Louvered Bahama shutters are permanently affixed above your windows and can be made of aluminum, fiberglass or even wood (though the metal variants hold up the best).
- Colonial shutters come at a higher price tag that reflects their design appeal. They're attached permanently beside windows over which they fold in, but they can't be used to protect doors.
- Direct-mounted storm panels come without the need for tracks and are anchored with bolts to the house wall.
- Accordion shutters are another permanent install. They anchor above doors or windows and can be rolled down either automatically or by hand.
Safety Precautions for Hurricane Shutter Installation
It's important to take safety precautions if you're installing your own hurricane shutters. For working with aluminum shutters, avoid carrying more than one panel at a time. You'll need to wear heavy leather work gloves to cope with their sharp edges, as well as closed-toed shoes and full-length pants.
Make sure to do dry runs regularly, and if you can, acquire some local "hurricane buddies" who can pool time and resources to help each other during a storm event. Reducing stress and pressure will make the process run more smoothly in the event of a real emergency.
Know Your Options for Hurricane Preparedness
Hurricane shutters are an excellent precaution against debris damage to your home's windows and doors, but they're just part of the picture. It’s crucial to keep in mind the added safety that can be offered by storm shelters or safe rooms, impact-resistant windows and simple all-around hurricane planning. Still, installing storm panels on your home can be a very important part of your hurricane toolkit.


