How to clean a Shower Head

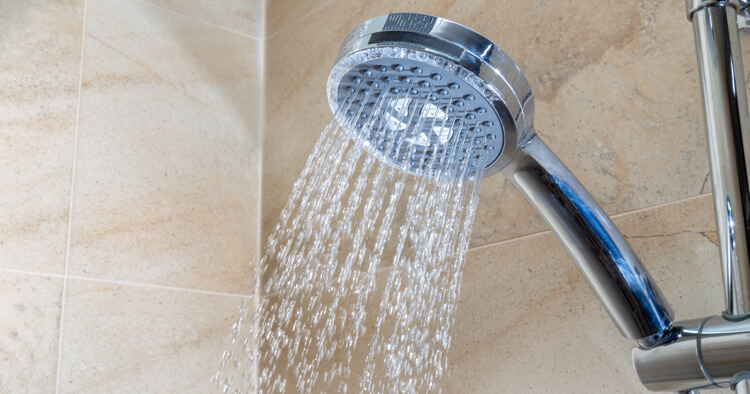
If your shower head has seen better days, you don’t necessarily need to upgrade to a new fixture right away. A little elbow grease can go a long way when it comes to eliminating soap scum and mineral buildup.
[1]:
[2]: /en-us/assets/images/blog/HomeServe-CTAsViewPlan.jpg
[3]: /en-us/assets/images/blog/HomeServe-CTAsAvailablePlan.jpg
[![HomeServeAvailablePlan][3]][1]
The following method by far the best way to clean your shower head. It just takes some good scrubbing, a descaling soak and a quick polish. And, it’s a great way to beat the grime with materials you already have lying around at home.
What you’ll need
Here’s what you should have on hand before getting started:
- Soft-bristled cleaning brush or sponge.
- Plastic gallon bag.
- Rubber band or twist-tie.
- Vinegar.
- Water.
- Toothpick (optional).
- Baking soda (optional).
- Microfiber cloth (optional).
Side note: Since this green cleaning method doesn’t use harsh chemicals, you won’t need to wear cleaning gloves. But, by all means, if your shower head looks as gross as some of the ones I’ve seen (in whose bathroom? I’ll never say!) ... well, you might just want a pair anyway.
Step 1: Scrub
First, you’ll need to scrub the shower head. Use a soft-bristled cleaning brush or rough sponge to knock the crusty mineral deposits out of the sprayer holes. Real Simple recommends using a trusty old toothbrush.
Learn More About Home Repair Plans Near You
Be careful: Wire wool and hard-bristled brushes may scratch or damage fine metal finishes. Be sure to use soft bristles and gentle scrubbing pressure to avoid this. If your shower head holes are surrounded by flexible plastic rings, you can even poke the buildup out with your finger or a toothpick.
Run the shower to see if the water flows out in a straight jet with consistent water pressure. If it doesn’t, pay a little extra scrubbing attention to the clogged-up holes.
Step 2: Soak
Soaking is a great way to descale the fixture and get rid of both the residue and hard water spots you can’t clear off with just a brush.
Fill a plastic bag — preferably of the sturdy zip-top gallon variety — with your own DIY cleaning solution. Good Housekeeping suggests using one part hot water and one part white vinegar. Half a cup of each should do.
Lift the bag with vinegar and water onto the shower head so that the sprayer holes are totally submerged in your cleaning solution. Use a rubber band or twist tie to secure the bag in place at the top or along the neck of the shower head.
Learn More About Home Repair Plans Near You
Leave it there to soak for anywhere from 30 minutes to several hours, depending on the finish of your showerhead and how caked-on the buildup is.
For fixtures coated with brass, nickel, or gold, keep the bag in place for just 15 to 30 minutes. Any longer and the acid might eat away at the finish. With other fixtures, feel free to leave the solution on overnight. This will give the vinegar solution a chance to loosen up the limescale around the shower head.
If it still looks a little clogged, repeat the process — this time, Better Homes and Gardens suggests adding a few tablespoons of baking soda in the solution and leaving it on for about 30 minutes.
Step 3: Rinse
After the soaking time is up, remove the bag and discard the cleaning solution down the shower drain. Gently scrub the shower head with a damp sponge or cleaning brush to wipe off any remaining residue.
Finally, run water through the shower head for a minute or so to flush out the system.
Step 4: Polish
Although this step is optional and just for show, you can buff the metal fixture with a soft microfiber cloth to restore its gleam. Make sure to soak up any moisture to prevent those pesky white water droplets from forming.
Learn More About Home Repair Plans Near You
Et voila! — it’ll look like you’ve just installed a dazzling new fixture, without ever having had to remove the shower head that’s been in your bathroom for years.
Bonus Step: Plumbing Protection
The shower head tends to be one of those things you use and see all the time, but very rarely think to maintain.
Many of us have the same attitude toward our home plumbing systems. All the elements are right there in front of us, we use them daily, but how often do we show them the care and attention they need?
After polishing off your bathroom fixtures and giving the tub a good old scrub, you may find yourself thinking about having a home repair plan in place to protect your budget from the costs of covered plumbing repairs.
Look to us to find a plan from Homeserve that will cover your plumbing repair needs.
[![HomeServeViewPlan][2]][1]


