How to Clean Your Keurig Coffee Maker in 6 Simple Steps

It's difficult to deny the convenience of a Keurig coffee maker. Setting aside the debate over eco-friendliness (not to mention the fact that Nespresso wins on the advertising front with those quirky George Clooney commercials), if you've got a household full of coffee drinkers who all have different palates, those appealing little K-cups offer a quick-and-easy caffeine fix in just about any flavor you can think of. But that convenience begets constant use, which in turn begets brown-residue buildup, drips, streaks, water spots and fingerprints — and that means your Keurig is going to need regular cleaning.
This May Also Interest You: Coffee Taste Nasty? Here’s How to Clean Your Coffee Pot
Here are six easy steps for cleaning your Keurig coffee maker:
1. Unplug the Keurig
Water inside your coffee maker is one thing, but water on your hands near electrical sockets isn't the kind of jolt you're looking for.
2. Wash Removable Parts
Remove the water reservoir and wash by hand it in the sink using soapy water, then rinse it thoroughly (Keurig advises against using the dishwasher for this). Also, pop open the top, and remove and handwash the K-Cup basket. If your Keurig has a reusable filter, you can wash that in the dishwasher, though Keurig recommends you do so only on the top rack.
3. Wipe Down the Outside
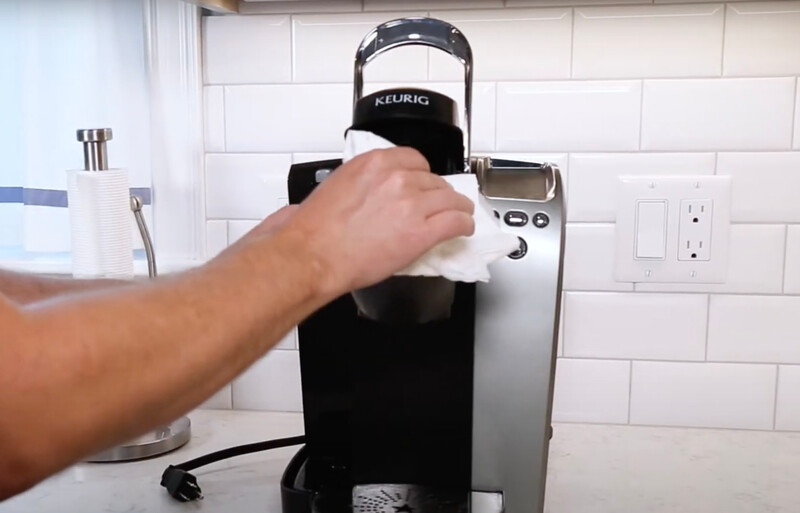
Wipe down the exterior with a warm, damp microfiber (or at least lint-free) cloth. Be sure to wipe the drip tray below where your coffee cup sits, the backsplash leading down from the dispenser to the drip tray, and the inside underneath the press-down lid and around the K-cup basket.
See all that brown grime on your towel? That's why you're doing this.
4. Cleanse the Inside
Fill the water reservoir with 4 cups of that veritable miracle cleaner, white vinegar, and start the brew cycle as if you're making coffee.
5. Run It Through
Run the brew cycle through fully until the reservoir is empty — oh, and be sure to have a receptacle under the dispenser to catch the vinegar or you're gonna find yourself with a whole new mess to clean up.
6. Make It Sparkle
Do a final polish on the press-down handle and the exterior of the K-cup holder where you just touched to get rid of smudges and fingerprints. See the grime on your towel? No? Exactly.
If your Keurig gets frequent use, you should shoot for at least a once-a-week cleaning schedule — after you've had your morning coffee, of course.
Watch the video below to see these tips in action.


