How to deep clean a Garbage Disposal

Homeowners who have a house with a garbage disposal often report that it is an added convenience. Whether it was pre-installed or you installed it, to maintain the garbage disposal and keep it in good working condition, you should keep it relatively clean. Industry professionals recommend that you clean your garbage disposal once a week. Once it begins to emit foul odors, the disposal requires a deep cleaning. The good news is that cleaning the appliance only requires a few steps and materials. Here is a step-by-step guide to get you started on cleaning the disposal.
[1]:
[2]: /en-us/assets/images/blog/HomeServe-CTAsAvailablePlan.jpg
[3]: /en-us/assets/images/blog/HomeServe-CTAsViewPlan.jpg
[![HomeServeAvailablePlan][2]][1]
Gather your supplies
When you clean the garbage disposal, begin by gathering your supplies. They include:
- A cup of baking soda
- A cup of vinegar
- Dish soap
- Ice cubes
- Citrus peels
- A kitchen sponge
- Rock salt
- An old toothbrush
- A flashlight
- Tongs
It's important to note that professionals in the plumbing industry do not recommend pouring harsh cleaners down your home's pipes for any reason. Even though you may be trying to unclog a drain, there are alternatives to harsh cleaners. And when in doubt, you can always call a plumber.
Pick your cleaning method
After gathering your supplies, you need to assess the current cleanliness of the garbage disposal in order to choose your cleaning method. You can clean your garbage disposal with just liquid dish soap and a sponge. If you notice that there is a slight odor coming from the appliance, however, you should consider going the baking soda and vinegar route. Citrus peels are used when the odor from the drain is persistent.
The best way to clean the garbage disposal is to get rid of the gunk, kill the majority of germs and eliminate the odor from the drain. If you have been keeping it fairly clean, begin with soap and a sponge. Then, go from there. You can give the appliance an easy scrub every other day.
There are times when persistent, foul odors from a garbage disposal are a sign that something is stuck in the appliance. It could also mean that the disposal is showing signs of age. The typical garbage disposal lasts eight to 15 years. If yours has reached this maturity, you may need to call in a professional for a closer look.
Step 1: Disconnect the Garbage Disposal
Safety first: Before you begin to clean your garbage disposal, disconnect it. You need to ensure that it will not be accidentally turned on by yourself or someone else. To disconnect the appliance, look under the sink for the cord that leads from your wall to the disposal. Pull the plug.
Turning on the garbage disposal is one way to double-check that you successfully cut the connection. If it does not run, you are good to go.
If you are not sure where the disposal's power source is located, cut the power off from the circuit breaker. Then, turn on the appliance. If it does not start, you are set to begin cleaning the disposal.
Step 2: Shine a Light and Clean
Next, take your flashlight and look down the drain. You are looking for food scraps and any other debris that might be stuck on the blades. With the tongs or old toothbrush you've gathered, pull at, loosen and clear away the dirt and grime.
Once scraps have been cleared away, pour down the ice cubes and rock salt. The goal here is to get rid of the debris you loosened from the blades.
Step 3: Cleaning with Dish Soap and a Sponge
To clean the garbage disposal appliance with the soap and a sponge, create a lather. A sponge with an abrasive portion is helpful in this situation because you need to scrub all sides of the drain's rubber baffle. It is important to clean underneath it so you can kill the germs in that area. Those germs have an impact on the rest of your kitchen sink.
Next, wash the grinding chamber. It is a good idea to keep running water on as you do this so you can clean the gunk you are scraping off from the sponge as you go.
Warm water works best and can help to keep killing the germs. If it gets too hot, run cold water. Then, switch back to warm.
Step 4: Clean the Drain with Baking Soda and Vinegar
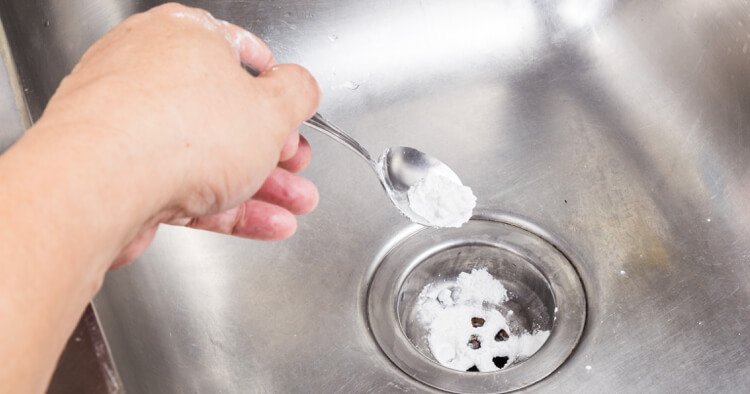
Pour half of the baking soda down the sink drain. Next, pour the vinegar down the drain as carefully and slowly as possible. White vinegar is preferred.
Cover the drain opening with your sink stopper because the combination of the ingredients is going to cause fizzing and bubbling. The stopper acts like a splash guard.
Wait about 15 minutes before removing the stopper. Pour warm water down the drain to flush out your homemade cleaning solution.
Use the remainder of your baking soda and vinegar to repeat the process one more time, if necessary. If you have two sink basins, clean them at the same time.
Step 5: Deodorizing the Garbage Disposal
You are well aware of all the items that you pour down the drain when you wash the dishes or clean up after cooking. (Nasty bits of food scraps, etc.) So it should be no surprise that the sink can get a little stinky. To deodorize the garbage disposal appliance and help your kitchen smell great, try citrus peels.
Cut the peels into small pieces. Pour them down the drain with cold water and some ice cubes. Turn on the disposal and let it run so that it grinds up the peels. The fragrant oils will be released from the peels and into your drain and kitchen.
The other way you can deodorize the disposal is to use bleach. Since bleach is a harsh chemical, you must be careful of backsplash and the amount that you breathe into your lungs. Dilute one part bleach with two parts warm water and pour this solution down the drain. After pouring, run warm water for a few seconds to clear away the bleach. Before taking this final step, remember that deodorizing the drain works best after you have cleaned it.
If you discover your garbage disposal needs more than a cleaning, being prepared with a home warranty from HomeServe is a great safety net. The costs associated with appliance repairs can add up. With a plan from HomeServe, when an issue arises, you just call the 24/7 repair hotline and a local, licensed, expert technician will be on their way as soon as possible. See what plans are available in your area.
[![HomeServeViewPlan][3]][1]


