Add Some Pizzazz to Your Outdoor Space: How to Build a Brick Pizza Oven

Building a Brick Pizza Oven at a Glance
- Step 1: Lay first block
- Step 2: Test space
- Step 3: Cut blocks
- Step 4: Layer and level blocks
- Step 5: Place capstone
- Step 6: Lay oven floor
- Step 7: Plan dome construction
- Step 8: Build dome
- Step 9: Construct chimney
- Step 10: Remove mold and sand mortar
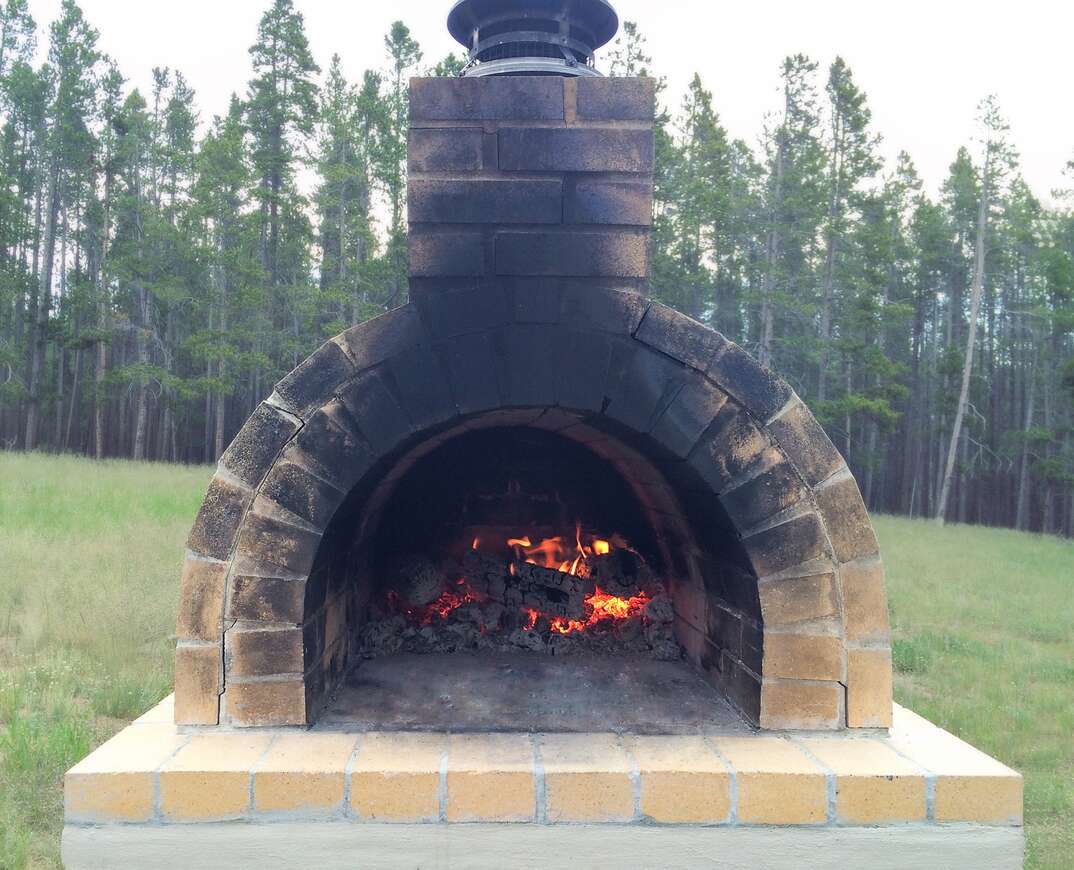
There’s just something special about pizza that’s been prepared in a wood-fired brick oven. Perhaps it’s the idea of using an ancient method of cooking, or maybe it’s simply the taste. No need to visit a restaurant to enjoy such a pizza; you can bring all the wood-fired goodness to your home whenever you wish if you build your own outdoor pizza oven.
This May Also Interest You: Outdoor Kitchen Inspo That Will Give You Major FOMO
Building a brick pizza oven is a job you can do yourself if you’ve got a moderate level of skill — even if you’re among the majority of the population who has never build a pizza oven before. The good news is that you’re only about 10 steps away from a wood-fired pizza. Follow this guide for building instructions.
How Much Does It Cost to Build an Outdoor Pizza Oven?
Determining how much a pizza oven is going to set you back is similar to budgeting for any outdoor kitchen. Your costs will be impacted by the materials and design that you choose and could run you as little as $1,500 or over $10,000 if you build a much larger oven and use premium materials. By building it yourself, you’ll be able to save a lot of money on labor. Many people invest these savings into a better design or materials they wouldn’t have been able to afford if they had to pay a contractor, too.
Can You Build a Pizza Oven With Normal Bricks?
There are numerous materials that you can use, but you’ve got to make sure that any type of cement, clay or brick that you choose is able to withstand temperatures of over 1,200 degrees. This heat resistance is the most important aspect to consider when you’re selecting the materials for your project because you’re going to be lighting fires inside of the structure. Not all bricks are made the same, so when you’re shopping, check the strength and heat resistance ratings for all of your materials.
How Many Bricks Are Needed for a Pizza Oven?
Depending on the size of your oven, you might need between 100 to 250 clay bricks and up to 25 concrete blocks. There’s no one-size-fits-all answer to this question because it depends on the dimensions of your design. The best way to determine how much material you will need for your own project is to create a blueprint before you purchase your materials. There are also pizza oven kits for sale that include all the materials you need along with detailed instructions that you can refer to as you build.
Step-by-Step Guide: How to Build a Brick Pizza Oven
Before you build your new oven, you need a place for it. The location you choose needs to have a level foundation and should be at least 3 feet away from your home. Building too close to your home or any structure presents a fire hazard, so leave at least 3 to 5 feet of space between the brick pizza oven and your home. Don’t store any materials nearby that could catch on fire.
Safety is extremely important, so make sure that you’ve got safety glasses, a respirator, gloves and protection for your ears. This project involves grinding bricks, which can send particulates into the air that may get into your eyes or lungs. Taking these precautions will lower your risk of injury.
Once you’ve selected a level place for your project, follow these instructions for how to build a brick pizza oven:
Step 1: Place the First Block
This block needs to be located at the center point of your foundation. Once you’ve found this spot, mark it and place the first block at this point.
Step 2: Test Out Your Space
It’s a good idea to stack all the blocks for your base to see how well it fits into the space you’ve selected. Without using any adhesive, put together a base so that you’ve got a feel for where the oven will sit and make sure you’re happy with it.
Step 3: Cut the Blocks
Cut your blocks to the design specifications. You can use a speed square to mark off where you need to make your cuts and an angle grinder when it comes time to score the blocks. Splitting the blocks requires a chisel.
Step 4: Layer the Blocks
Since this is the base upon which everything else is going to rest, you need to take extra care that the first layer is both level and plumb. Use landscape adhesive between layers. The best place to apply adhesive is in the center of each block so that it won’t gush out over the sides. Use two lines of adhesive before placing a block on top. Staggering the block joints adds structural integrity and ensures your pizza oven won’t topple.
Keeping every layer level is important, so always check a layer before proceeding to the next. If you discover that a layer is not plumb or level, you can use a rubber mallet to adjust the positions of each block until they all fit into place.
Step 5: Place Your Capstone
The capstone is the base for your outdoor pizza oven. Once you’ve built to a height that you desire, add adhesive to the top of the current layer. Then, place the capstone on top of it. Once again, make sure that your structure is level.
Step 6: Lay the Oven Floor
Follow the instructions to mix the mortar after you’ve laid out the bricks on your capstone. Apply the mortar to each brick and then place them down. It’s advised to let the oven floor set for a day before you proceed with laying the dome.
More Related Articles:
- Guard Your Grill: Keep Charcoal, Gas Grills Working by Keeping ’Em Clean
- How Much Does It Cost to Install a Patio?
- How to Build a Patio: 9 Steps to Backyard Paradise
- Electric Vs. Gas Heaters: Which Kind Is Best for Your Patio?
- How Much Does a Patio Heater Cost to Rent or Buy?
Step 7: Plan the Construction of the Dome
You’ll need to create a mold to build the dome on before laying any bricks. This can be constructed using 2x4s and plywood. Draw the shape of your dome onto the plywood before cutting it with a jigsaw. Make a second one with identical dimensions and attach the two pieces of plywood to the 2x4s before bending a piece of lauan bending plywood over the top and securing it in place.
Step 8: Build the Dome
Use the mold that you created earlier to support the bricks as you lay them. When you apply mortar, you should use a thicker layer than you used on the oven floor and stagger the joints on the bricks. If you get mortar on the bricks, that’s okay. You can use a lightly wet sponge to wipe the excess off.
Use the mortar to help create the shape. To create the rounded shape of the dome, you’ll need thicker layers of mortar as you get closer to the top. As you’re building the dome, you’ll find that you need to cut bricks to size as you go. Just take your time and work patiently. Remember to leave an 8-inch by 8-inch gap for your chimney at the top of the dome toward the front of the pizza oven.
Step 9: Build the Chimney
Using the same bricks you’ve used for the dome, create a chimney that is four to five layers high, using mortar to secure the bricks. It’s important to check that the chimney is level during this step. Make any adjustments you need to ensure it is.
Step 10: Remove the Mold
It’s a good idea to wait for at least three days before taking the mold out of the oven so that the mortar is able to secure and harden. Be careful when removing the mold, and take your time to remove all the screws or nails that you used to build it before prying the pieces of wood out with care.
Before you use your oven, make sure you sand away any mortar that is left over so that you have a smooth surface along the oven floor. Now, you can begin cooking.
Keeping your oven clean is easy because the heat will do most of the work for you, similar to a self-cleaning oven. All you need to do is occasionally scrape out any excess soot or debris from time to time. Spills may occur from time to time, and you want to limit the buildup of grease. This can be handled quickly and easily with a damp cloth. The cloth will loosen the debris so that it will be easier to scrape away.


