How to Install an Attic Fan

Installing an Attic Fan at a Glance
- Tools & Materials: Caulk, claw hammer, screwdriver, saber saw, pencil, mask, goggles, nails, wood screws, plywood panel
- Step 1: Remove old shutter
- Step 2: Cut new vent hole
- Step 3: Install new shutter
- Step 4: Make mounting panel
- Step 5: Mount fan
- Step 6: Wire fan
If you've never thought about your attic's ventilation system, you could be missing an opportunity to create a more comfortable living space and even save money on your utility bills. Alongside attic vents, installing an attic fan is a cheap, easy way to stop your attic from overheating. Home inspectors sometimes recommend installing an attic fan if your existing ventilation system is inadequate.
This May Also Interest You: No AC? No Sweat. Here’s How to Keep Cool
According to Popular Mechanics, your attic accounts for around 20% of your overall home cooling costs, so your initial outlay should be well worth it based on the money you’ll save in energy costs. Below, you can find out how to install an attic fan using simple step-by-step instructions.
Is an Attic Fan Easy to Install?
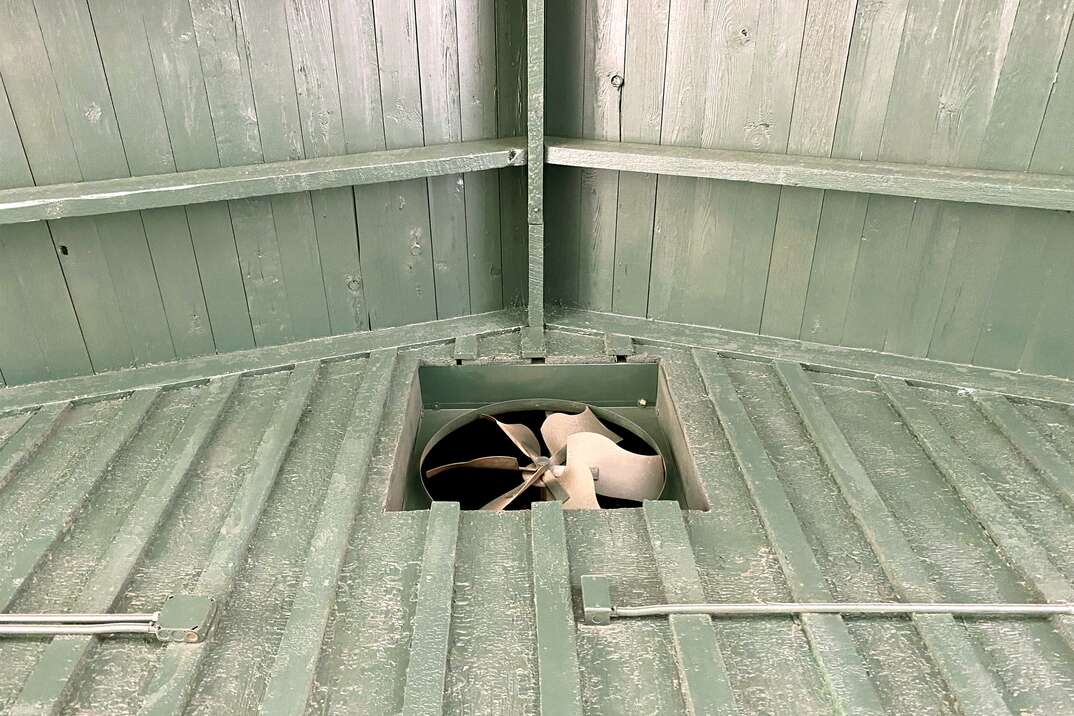
An attic fan is relatively easy to install because you won't need to make any structural changes to your home, especially if you use an existing roof or wall vent. Overall, it's easiest to install an attic fan on a gable wall because you won't need to remove any tiles or shingles from your roof.
The most complex stage of installation is wiring the fan into a nearby electrical circuit, so many homeowners prefer to hire a professional electrician to do this step for them. If you want to avoid working with your home’s electrical wiring, you may choose to invest in a solar attic fan instead. These ventilation fans get energy from sunlight, so there's no need to connect them to your electricity supply. While they're a bit more expensive than wired fans, they're an eco-friendly solution and could save you money on your electricity bills in the long run.
Attic Fan Installation
Attic fans come with a thermostat that switches the fan on when the attic temperature rises beyond a certain point. Attic fans generally cost around $100 and can significantly reduce your cooling costs alongside adequate ventilation and attic insulation. Before you start, make sure that you can access your attic safely using a secure and sturdy ladder.
You have two choices when it comes to installing an attic fan: roof or gable-wall installation. Gable-wall fans are generally easier to fit yourself because you won't need to remove any of your roofing materials. These instructions are for a gable-wall installation.
You'll also need the following materials and equipment:
- Caulk
- Claw hammer
- Screwdriver
- Sabre saw
- Pencil
- Protective mask and goggles
- Nails
- 1-inch wood screws
- Plywood panel
Step 1: Remove the Old Shutter
You may be able to skip this step if your existing vent is the correct size for your new attic fan. If not, you'll need to install a new shutter. Start by using a claw hammer or screwdriver to remove the fixings securing the old shutter and remove it from the wall.
Once you've removed the shutter, you need to measure the vent hole. Place the new shutter over the existing hole and use a spirit level to make sure it's straight. Draw around the inside of the shutter, then draw a second square 5/8 of an inch smaller on each side than the first line. If there is wooden framing around the existing hole, use a saw to cut it away and set it aside for later.
Step 2: Cut a New Vent Hole
Using a saber saw, carefully follow the lines of the smaller square and cut away the wall material to create a new vent hole. It's best to wear protective eyewear and a mask for this task because it can create a lot of dust.
Step 3: Install the New Shutter
Once you've created your new vent hole, place the shutter on your original guidelines and use wood screws to attach it to the wall. If you removed any wooden framing, reinstall it around the new shutter for extra support. Finally, seal the entire perimeter with caulk.
Step 4: Make a Mounting Panel
Installing a plywood mounting panel stops the fan blades from hitting the wall and reduces the chance of damaging the wall when you install it. Draw a circle the same size as your attic fan on a plywood panel and cut it out with a saber saw. Many attic fans come with a template to help you cut your mounting panel to the correct dimensions.
Step 5: Mount the Fan
Screw the fan's mounting brackets to your mounting panel, taking care to ensure that the fan is the right way up. Use a hammer to nail the plywood panel to the framing on the gable wall.
Step 6: Wire the Fan
Finally, you'll need to wire the attic fan to an available electrical circuit in your attic following the manufacturer's instructions. Switch the power off at the breaker before you start. It's also important to make sure that you don't overload the circuit by installing too many fixtures. Wiring your fan incorrectly could cause a fire hazard, so it's best to ask an expert to help with this step unless you're confident you know how to do it.
More Related Articles:
- Got Gable Vents? Here’s What You Need to Know About Your Attic’s Airflow
- How to Insulate Your Attic in 7 Steps
- How Much Does Attic Insulation Cost?
- Step Up Your Storage Game by Installing an Attic Ladder
- How Much Does It Cost to Install an Attic Ladder?
Where Should Attic Fans Be Placed?
You can place attic fans in the roof or in the gable wall inside your attic space. If you want to place a fan in the roof, you should position it between the rafters. Ideally, you should place your new attic fan over one of your existing vents, cutting a larger hole if necessary. This saves you the time and inconvenience of creating a new vent.
Why Should You Install an Attic Fan?
Often, attic vents do a decent job of keeping your attic cool and ventilated without any need for an attic fan. However, there are some circumstances when installing an attic fan is a good idea.
If you notice that your home frequently overheats or you're spending a fortune on running your air conditioner, an attic fan could give your ventilation system a helping hand. Humid attics often cause mold issues, which cost a lot to rectify and can even lead to breathing problems. If you see mold growing in your attic, an attic fan can help keep the space cool and dry enough to prevent further growth.
However, attic fans come with a few potential drawbacks. Unless you choose a solar attic fan, the fixture will add a little to your electricity bills. But assuming you're installing an attic fan because your air conditioning costs are sky-high, you may actually lower your overall utility bill.
It's also worth mentioning that attic fans blow air from outside into your home. While this may not be an issue for many homeowners, it could be a problem if you live in a very polluted area or suffer from seasonal allergies.
Can I Install an Attic Fan With a Ridge Vent?
Ridge vents, also known as soffit vents, lie across the peak of your roof and allow hot air to escape while encouraging airflow throughout your attic space. They allow cool air to enter the attic while hot air rises and exits the soffit vents naturally. Therefore, they're an inexpensive way to cool your attic because they don't require an energy source.
It's generally not a good idea to install an attic fan with a ridge vent because it could stop warm air from escaping through the vent or disrupt the natural airflow throughout your attic. It could also draw rainwater into your attic space, making it ripe for mold growth.
As long as you have adequate soffit vents, you shouldn't need an attic fan. However, if you feel that your roof vents aren't enough to keep your attic cool and ventilated, a gable attic fan could be a potential solution. It's worth consulting an expert first to make sure that adding an attic fan won't unbalance your ventilation system. If you have both ridge vents and an attic fan, check your attic regularly to make sure that there isn't any rainwater coming in.


