What Is Wainscoting?

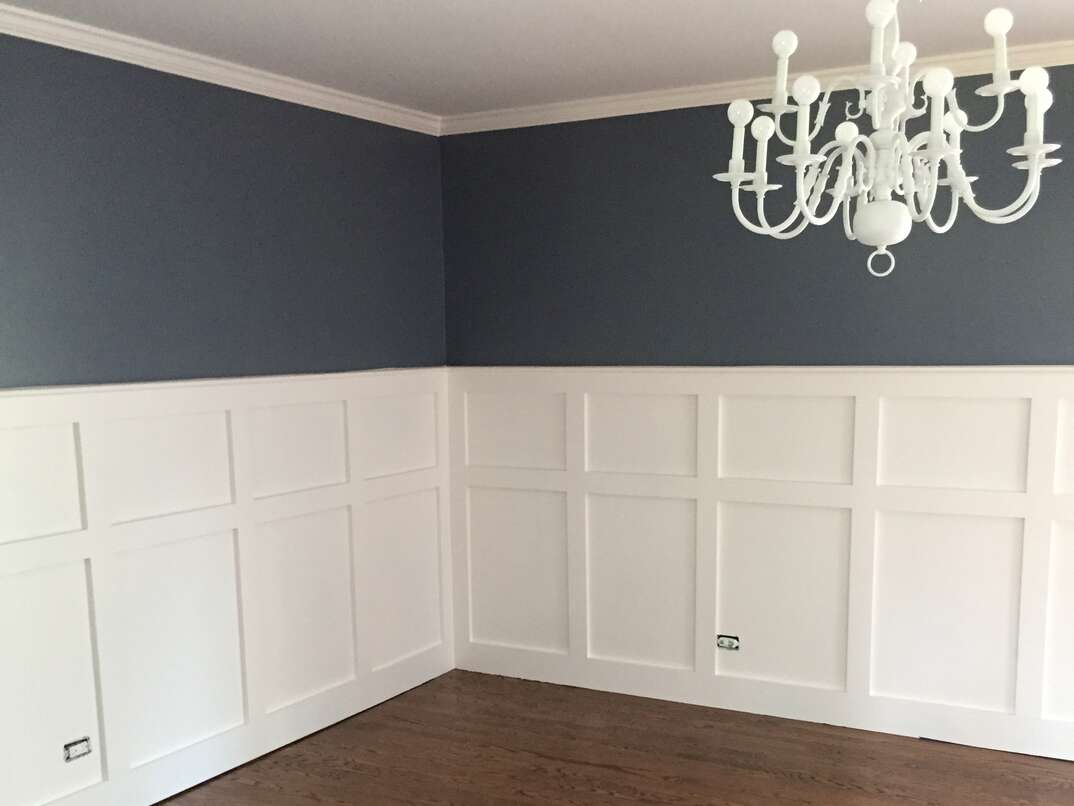
Wainscoting is a type of paneling that covers just the lower portion of a wall. Centuries ago, the technique was used to insulate homes. These days, it’s mostly used for decoration. It’s a simple way to add dimension to any space — or even cover up a damaged wall.
This May Also Interest You: Ensure Your Shiplap Walls Are Shipshape With This Step-by-Step Installation Guide
Wainscoting remains popular all these years later because it can fit with any decor. It’s also easy enough to DIY. Read on for everything you need to know.
What It Is
Wainscoting covers the lower half or lower third of a wall. While it was originally made of wood, you can use almost any material you like. You can purchase plastic, vinyl, stone or ceramic wainscoting.
To achieve the wainscoting look without doing any construction, you can use peel-and-stick wallpaper with a wainscoting design.
Types of Wainscoting
The type of wainscoting you choose will likely depend on the style or decor you’re trying to match. Here are the most common types of wainscoting:
Raised-Panel
Raised-panel is the original design of wainscoting. Backboards are installed, then panels are placed on top for a raised effect. Raised-panel wainscoting offers a classic design.
Overlay
Overlay wainscoting is similar to raised-panel, but comes in a variety of geometric patterns.
Flat-Panel
Flat-panel wainscoting is typically minimalist and modern in design. It consists of flat panels behind raised rails.
Board and Batten
This is also called Shaker wainscoting. It looks similar to flat-panel wainscoting, but with additional vertical boards. The end result looks like uniform, rectangular cutouts.
Shiplap
Shiplap is paneling installed horizontally and is used to create a rustic look.
Beadboard
Beadboard looks like vertical boards with ridges (“beads”) in between. It is common in rustic or country-style homes. It usually comes in panels that snap together.
Can Wainscoting Be Used for Different Rooms?
Wainscoting is commonly used in living and dining rooms, but can also work in bedrooms, finished basements, mudrooms, bathrooms and other spaces. In hallways, stairwells and other high-traffic areas, it can protect your lower walls from damage.
More Related Articles:
- How Much Does Drywall Cost?
- How to Finish Drywall: Taping, Mudding and Sanding
- How to Hang Drywall: A 7-Step Overview
- How to Install Kitchen Backsplash in 7 Simple Steps
- How to Fix a Hole in the Wall
How to Style Wainscoting
Traditionally, wainscoting covers the lower half of walls with neutral-colored paneling. But these are design rules you can break!
With white walls, try colorful or patterned wainscoting, and with colored walls, try wainscoting in white, gray, black or wood tones. For a subtle look, paint wainscoting the same color as the wall. You could cover an entire wall with wainscoting to create a feature wall. Use the top trim as a shelf for photos and other items.
How Much Does Wainscoting Cost?
Wainscoting costs $7-$40 per square foot depending on the type. Flat-panel, beadboard, shiplap and board and batten wainscoting cost between $7 and $20 per square foot. Overlay and raised-panel wainscoting cost $10 to $40 per square foot. In terms of labor costs, expect to pay about $90 per hour. Custom wainscotting costs more to install than prefab panels.
Including labor and materials, professional installation of wainscoting will cost between $2,000 and $5,000. You can save on labor costs if you install it yourself.
How Is Wainscoting Installed?
Wainscoting is a popular DIY project because it doesn’t require specialized tools or knowledge. Before you start, however, you’ll want to watch a full tutorial specific to the kind of wainscoting you’re installing. For a quick overview, here are the steps involved in most projects:
1. Starting in a corner of the room, measure the room and purchase the right number of panels or boards for your design.
2. Paint or stain your material before installing to save time.
3. Remove molding and baseboards.
4. Mark the space where the wainscoting will be installed and use a stud finder to pinpoint where you will able to place boards.
5. Put panels in place, making adjustments around outlets and other fixtures in the room.
Since we’re all home now more than ever, being prepared for unexpected home repairs with a plan from HomeServe is important. Having a plan in place gives you the peace of mind knowing that you can simply call our 24/7 repair hotline for covered breakdowns. See what plans are available in your neighborhood.


